Emperor Penguin and Atlantic Puffin
One note about working with clay. Before clay gets fired but is in ready-to-fire stage, it is extremely brittle. To form the wings of Emperor Penguin was quite tricky because they are long, thin and away from the body. Any little bump and they are history. Same goes for little fish in Puffin's beak. When I look at these pieces now, after 2 years of not touching clay, I wonder how I did it. I thing that it is high time for me to go back to my basement studio and check my clay and get ready to make some more pottery.
Emperor Penguin
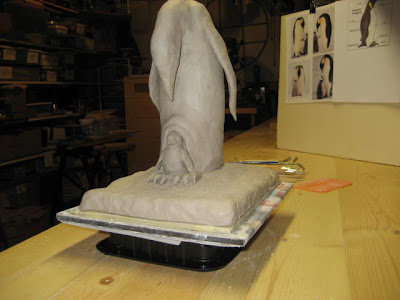
Here is a picture story of my Emperor Penguin.
This is not a one day or even one week project. Here, the patience truly is a virtue.
Almost there.
Most important thing now is to control the rate of drying. You do that by covering whole piece in light plastic with a very small opening at the top. I have left one side of base uncovered just a bit and in few days it cracked because the rate of drying was much faster there then on other side. Clay is completely unforgiving. Since walls were about 1/2” or more in some places it takes at least 2 weeks to dry to stage where you can uncover it and finish the drying process.
The piece was bisque fired and now is time to apply glaze and color stains. Steady hand is not an option but absolute must.
Notice the sketches and photos on all the studio pictures. You can not work without them. Just like in cooking, prep is half the battle won.
Ready for a glaze firing in kiln. Notice the fixed crack in base.
Not bad for somebody that never sculpted or painted before. The cheeks came out really nice. The gradient color from orange to yellow is so difficult to execute on pottery. You deal with powders and do not have the luxury of water doing the blending for you.
It was fun!
Atlantic Puffin
Just like the Emperor Penguin, this sculpture was fun to make and very tricky to work on. Everything I wrote about Penguin sculpture applies to Puffin. Applying glaze and stains was a real fun. I haven’t painted anything since primary school so it was something quite new to me.
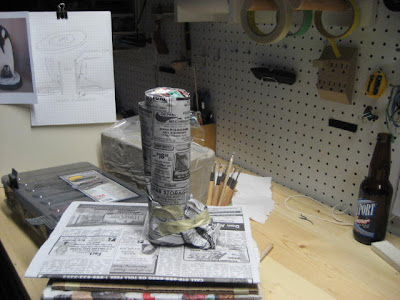
Checking the design board. It is too bad that I didn’t record process from beginning. This sculpture had no structural support. The clay slabs were wrapped around newspaper bunched into a body shape mold. Then it was just let it dry a bit, add some more coil or slab and repeat. It was fun! I miss it.
Yes, I am painting, just like I did with Emperor Penguin. What can I say: I was shocked how well the glaze came out. And yes, I do like sculpting with clay.
You want fish from my beak? Get your own!
I have spend few hours on making and glaze painting the foot detail.
My Atlantic Puffin resting on a real snow.
This was a fun project.


